Running Emergency Power System Tests
Event Test Types are described in the following table. Steps for running these tests are provided in this topic.
See also Emergency Power Management System.
Load | Aurora will send a test signal to all ATSs either automatically or through manual control using the software. The test is for a set duration as configured by the admin. |
No Load | Aurora will send start command to the generator(s) without sending start commands to ATSs. |
Manual Load | This test is setup in the software but waits to launch until the user manually engages the equipment (or via the user interface in the in the software). The test is for the duration configured in the software. |
Load Shed | If a load shed event type is set up for a system, this test is an auto load test but with an open-ended duration. At the end of the desired test length, the cancel button must be manually selected for the test to end. |
Manual Config | The user can customize a test by selecting the test type (Load Test, No Load Test, Manual Load Test) and set a duration, bypassing the value configured by the administrator. |
Auto Load Tests
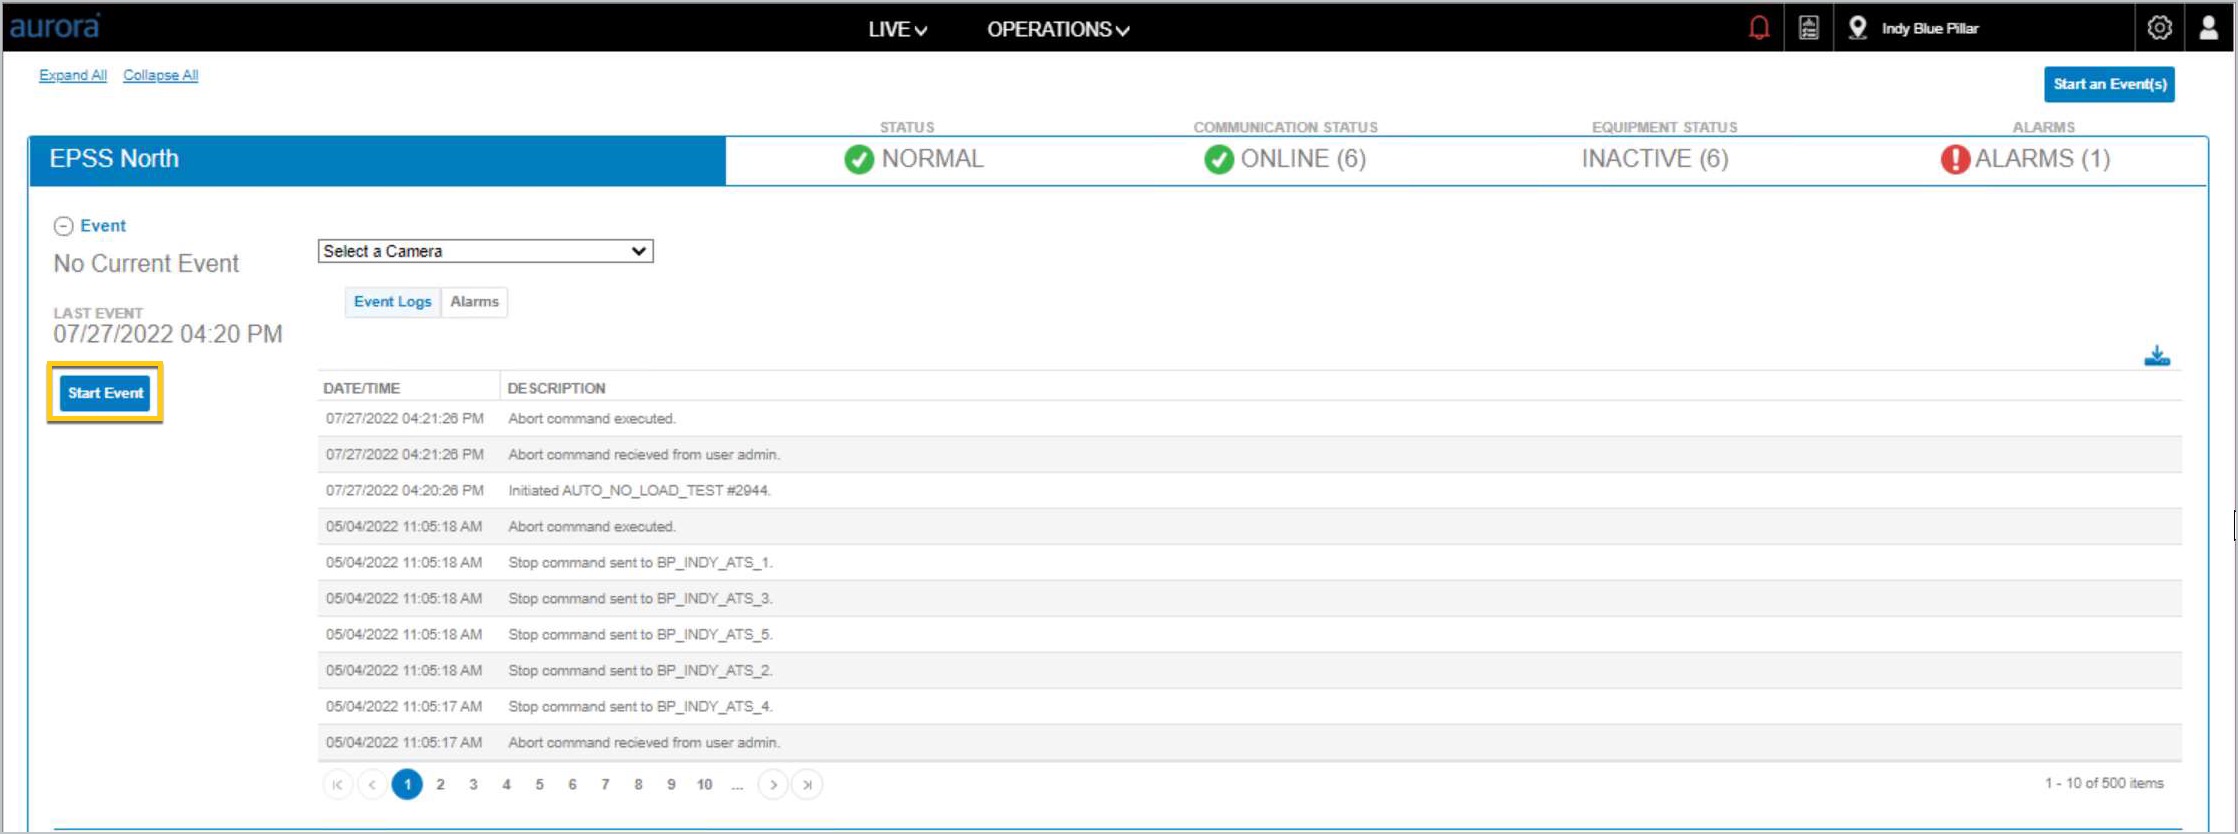
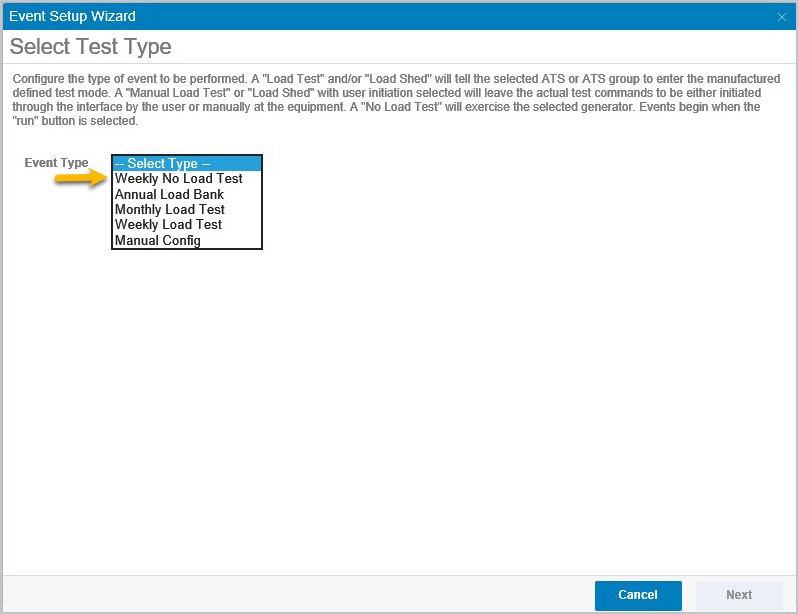
While in the EPMS view, click the Start Event button screen left. The platform will launch the Event Setup Wizard.
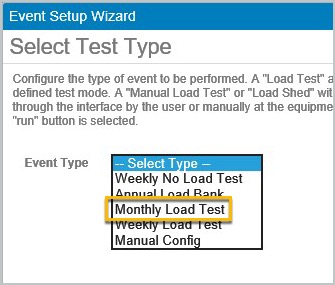
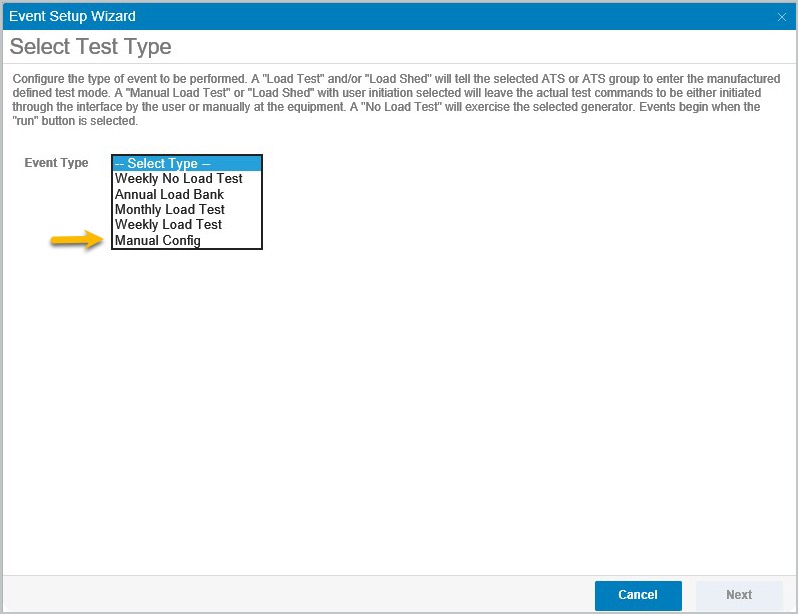
Select the Test Type from the Event Type list.
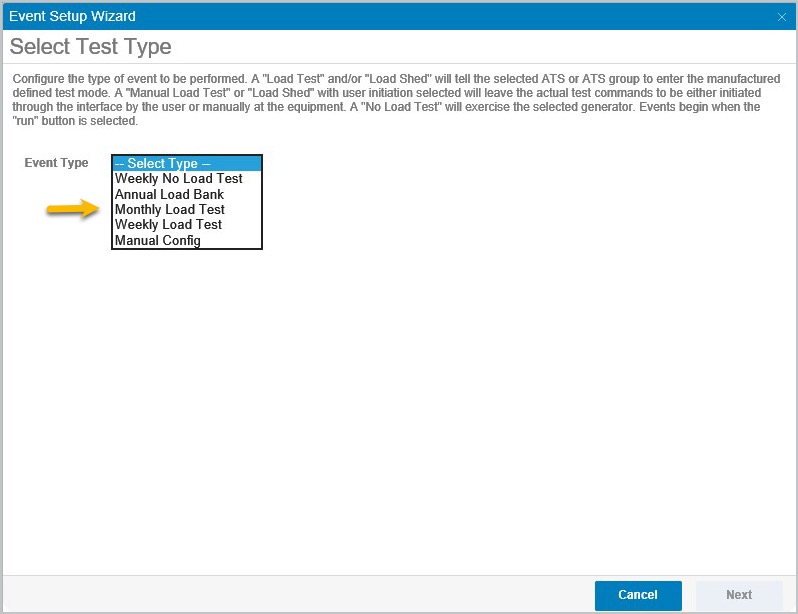
After the Event Type is selected, the Next button will be activated. Click to proceed.
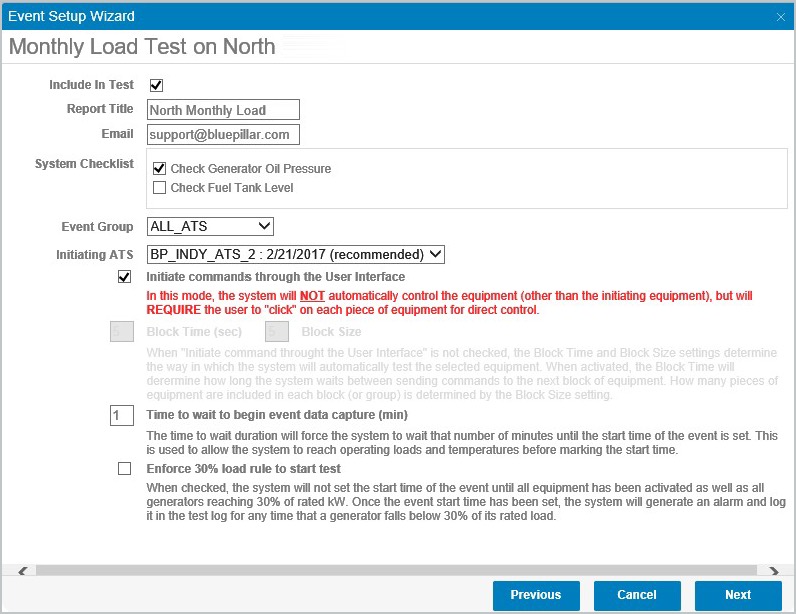
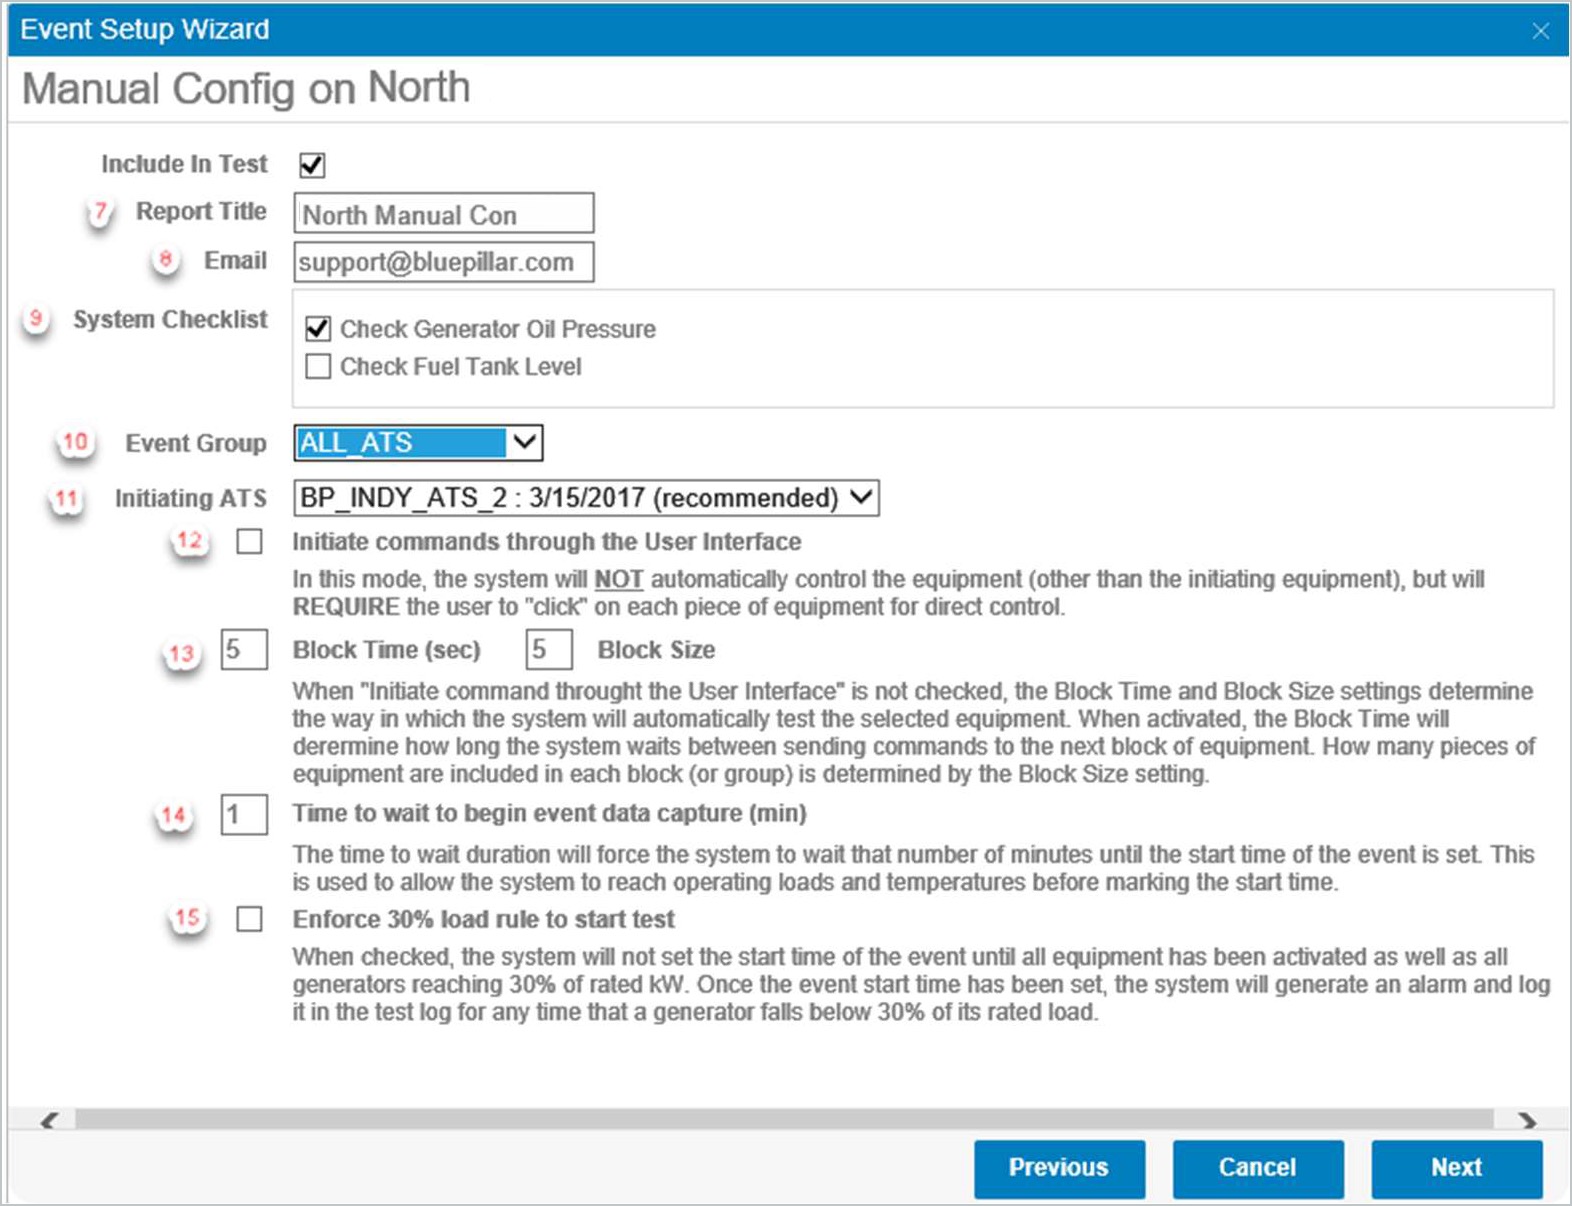
Use the default Report Title or change the name of the event.
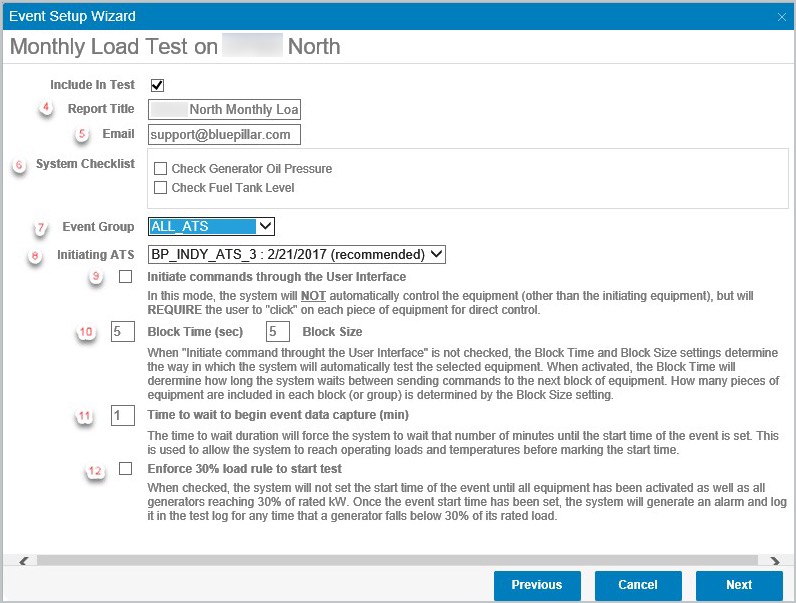
Use the default email or change/add an email separated by commas to receive event reports.
If applicable, use the toggles in the System Checklist fields.
Select an ATS Event Group.
Use the default (suggested) from the drop down menu Initiating ATS -or- select a different one as relevant.
Select Initiate commands through the User Interface only if each piece of equipment will be controlled manually from the platform User Interface. When using this toggle, clarification of the event will appear on screen.
Skip to use defaults or modify the entries for Block Time (sec) and Block Size.
Skip to use defaults or modify the entries for Time to wait to begin event data capture (min).
Optional: Select the Enforce 30% load rule to start test for the system to start the test once the generator reaches 30% of the rated kW.
Click the Next button to continue with the Event Setup Wizard.
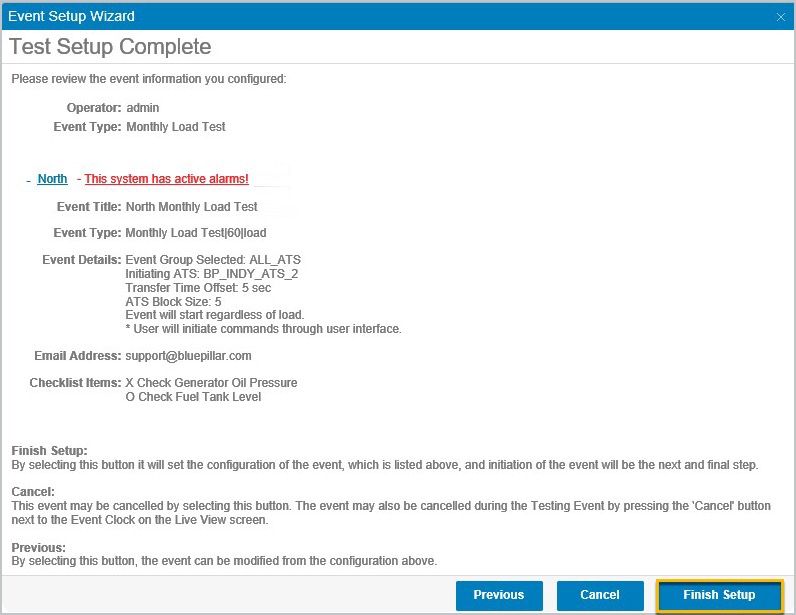
Expand the system details by clicking on the (+) symbol next to the system name so that the platform displays event setup details.
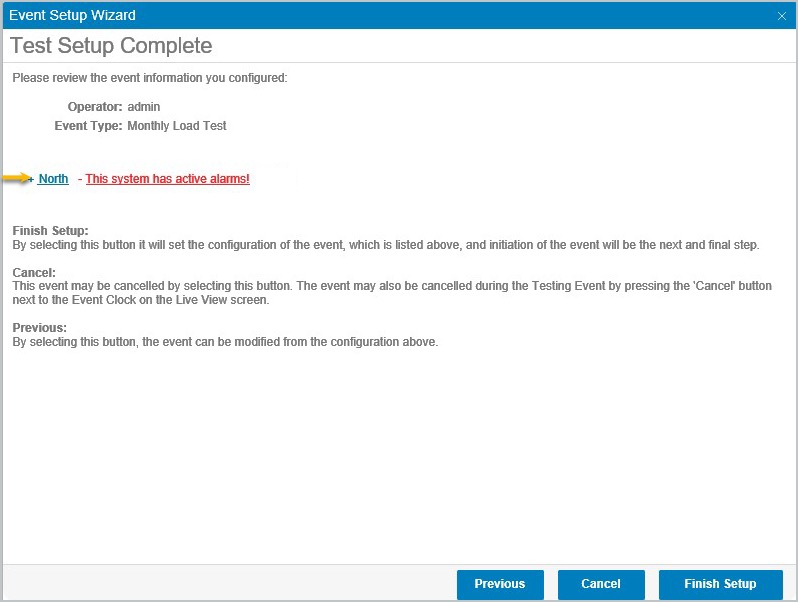
Review the entries and selections.
Click the Previous button to make modifications to entries on the previous page.
Click Cancel to end the event setup. Any actions will be lost.
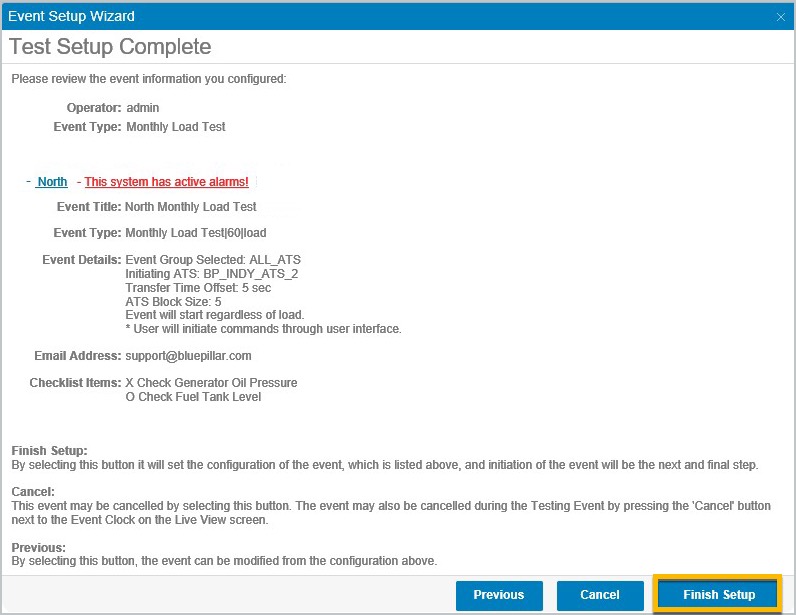
When ready to proceed, click the Finish Setup button; the platform will display a final confirmation screen.
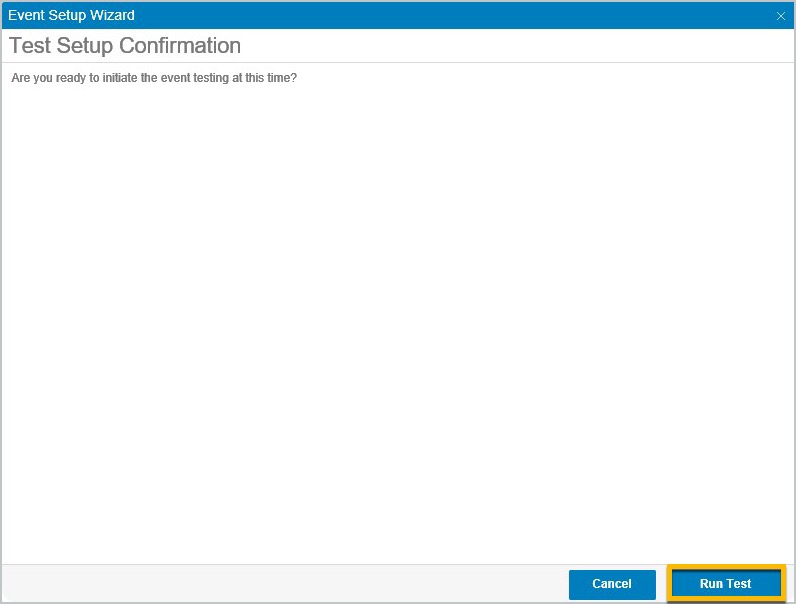
Click the Run Test button to start the test.
The test will start once clicking the Run Test button.
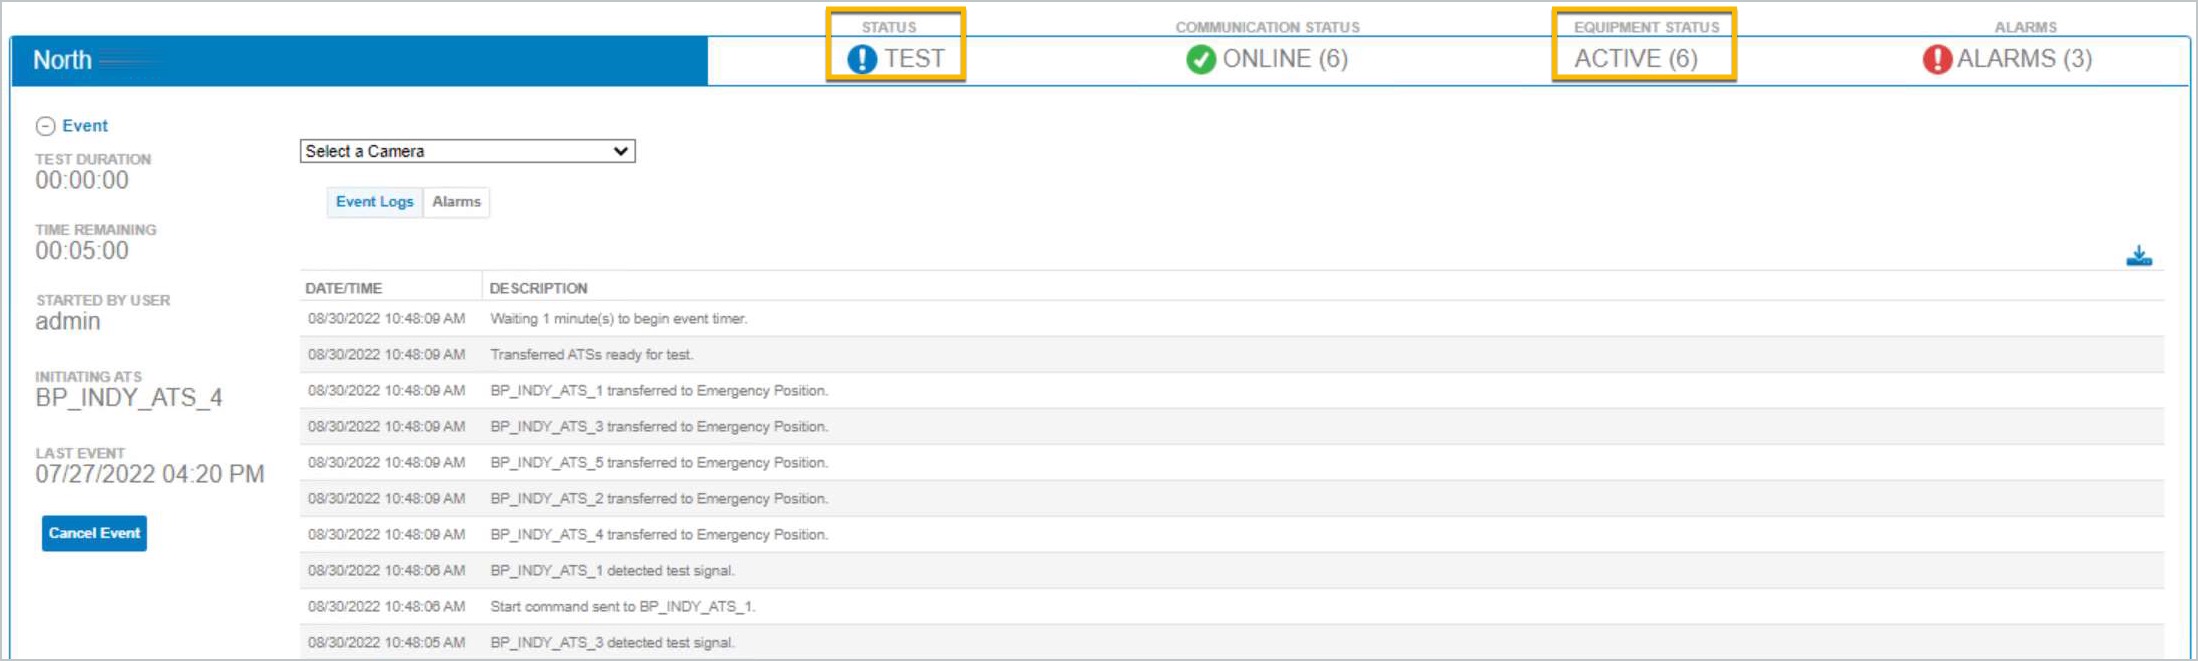
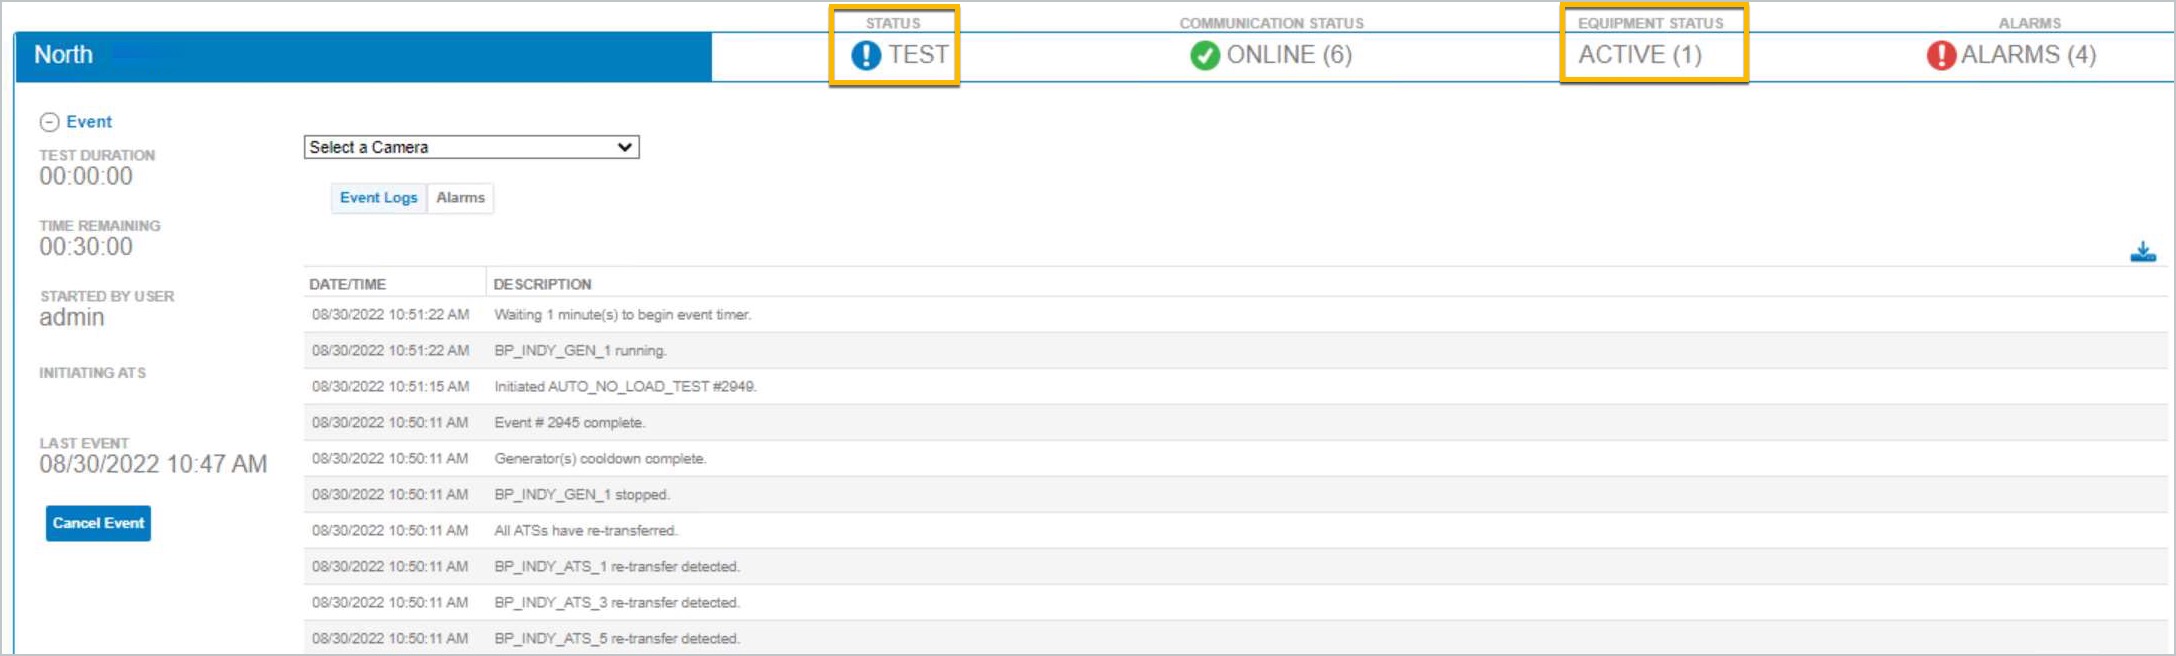
Monitor the test from the EPMS screen.
The platform will initiate the test and send commands to the ATS(s) to transfer to emergency power.
The platform sets the Status field to TEST and the Equipment Status field will list the number of ATS devices with an active status.
The ATS(s) will transfer and the generator(s) will start.
ATS(s) that fail to transfer will be eliminated from the event. If all ATS(s) fail to transfer, then the event will abort.
Under the Equipment Details header, the platform displays the equipment in the test. These will be highlighted as ACTIVE.

Once all the ATS(s) have transferred, the platform will pause and wait a configured period before starting the event timer.
When the event time remaining reaches 00:00:00, the platform will send stop commands to the ATS(s) to re-transfer to normal power.
The ATS(s) will re-transfer and the generator(s) will stop.
Once all the ATS(s) have re-transferred and the generator(s) cooldown processes have completed, the platform will end the event.
The event can be cancelled at any time by clicking the Cancel Event button. See Event History in this user guide to learn how to access event details and reports.
No Load Tests
While in the EPMS view, select the Start Event button so that the platform displays the Event Setup Wizard.
Select the Test Type from the Event Type list.
After the Event Type is selected, the Next button will be activated. Click to proceed.
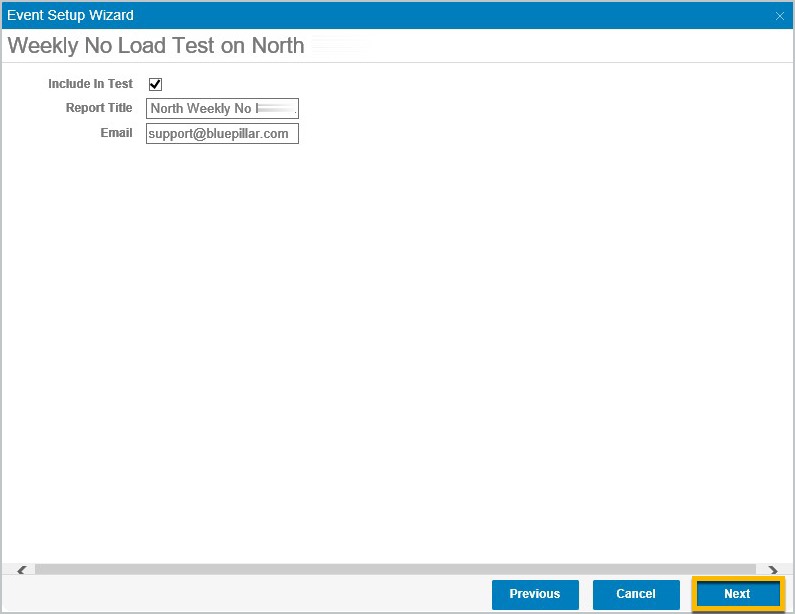
Skip to use the default Report Title or change the name of the event.
Skip to use the default email or change/add an email separated by commas to receive event reports.
If applicable toggle the System Checklist items. These are configured in advance by the administrator.
Expand system details by clicking the (+) symbol next to the system name in order for the platform to display event setup details.
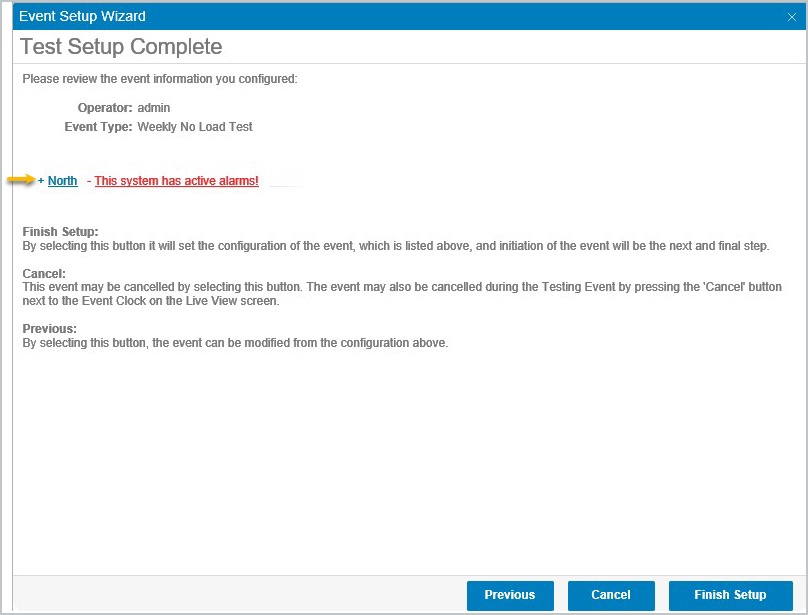
Review entries and selections.
Click the Previous button to make modifications to entries on the previous page.
Use the Cancel button to cancel the event setup. Any actions will be lost.
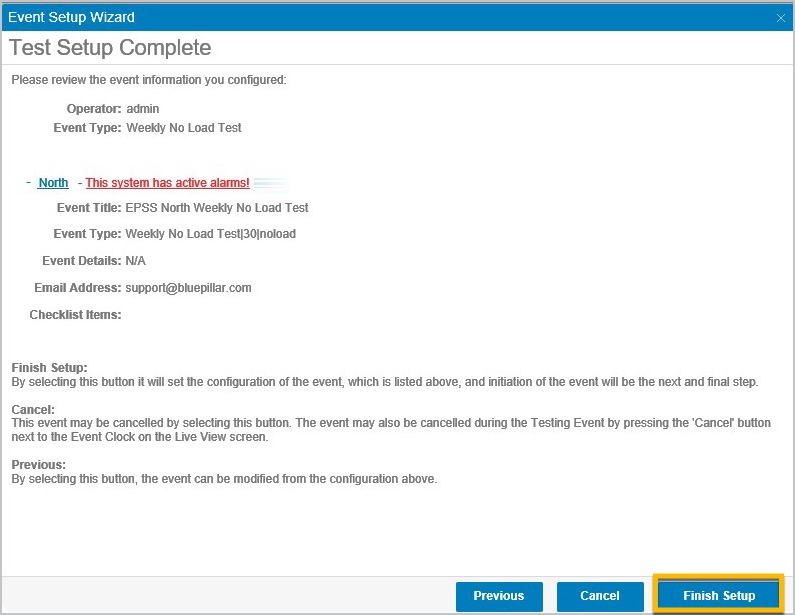
When ready to proceed, select the Finish Setup button. The platform will display a final confirmation screen.
Click the Run Test button to start the test.
The test will start once clicking the Run Test button.
Monitor the test from the EPMS screen.
The platform will initiate the test and send a command to start the generator(s).
The platform sets the event Status field to TEST and the Equipment Status field displays the number of active assets.
The generator(s) will start.
Under the Equipment Details header, the platform displays the equipment in the test. These will be highlighted as ACTIVE.

Once all the generator(s) are running, the platform will pause and wait a configured period before starting the event timer.
When the event time remaining reaches 00:00:00, the platform will send stop commands to the stop the generator(s).
The generator(s) will stop.
Once the generator(s) have stopped and the cooldown processes have completed, the platform will end the event.
The event can be cancelled at any time by clicking the Cancel Event button.
See Event History in this user guide to learn how to access the event details and reports.
Run Manual Load Test: Initiating Commands from User Interface
While on the EPMS screen and viewing a system, select the Start Event button so that the platform launches the Event Setup Wizard.
Select the Test Type from the Event Type list.
After the Event Type is selected, the Next button will be activated. Click to proceed.
Use the default Report Title or change the name of the event.
Use the default email or change/add an email separated by commas to receive event reports.
If applicable, toggle to select System Checklist items.
Select an ATS Event Group.
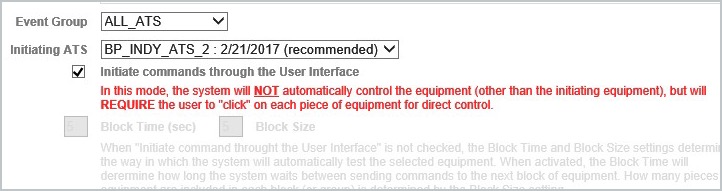
Use the default menu option (recommended) Initiating ATS or select a different one.
Click to select Initiate commands through the User Interface; the platform will disable Block Time (sec) and Block Size.
SKIP to use the default configured Time to wait to begin event data capture (min).
Optional: select Enforce 30% load rule to start test so the system starts the test once the generator reaches 30% of the rated kW.
Click Next to proceed with the Event Setup Wizard.
Expand the system details by clicking on the (+) symbol next to the system name so the platform displays the event setup details.
Review the selections.
Use the Previous button to make changes to the event.
Use the Cancel button to cancel the event setup. Any actions will be lost.
When ready to proceed, click to select the Finish Setup button; the platform will display a final confirmation screen.
Click to select the Run Test button; the platform will start the test at this time.
The user will control the equipment and monitor the test from the EPMS screen.
An on-screen message will indicate that, The system is waiting a manual command. Both [-] and [+] icons will appear next to each ATS (except for the initiating ATS) in the Equipment Details section bottom of the page.
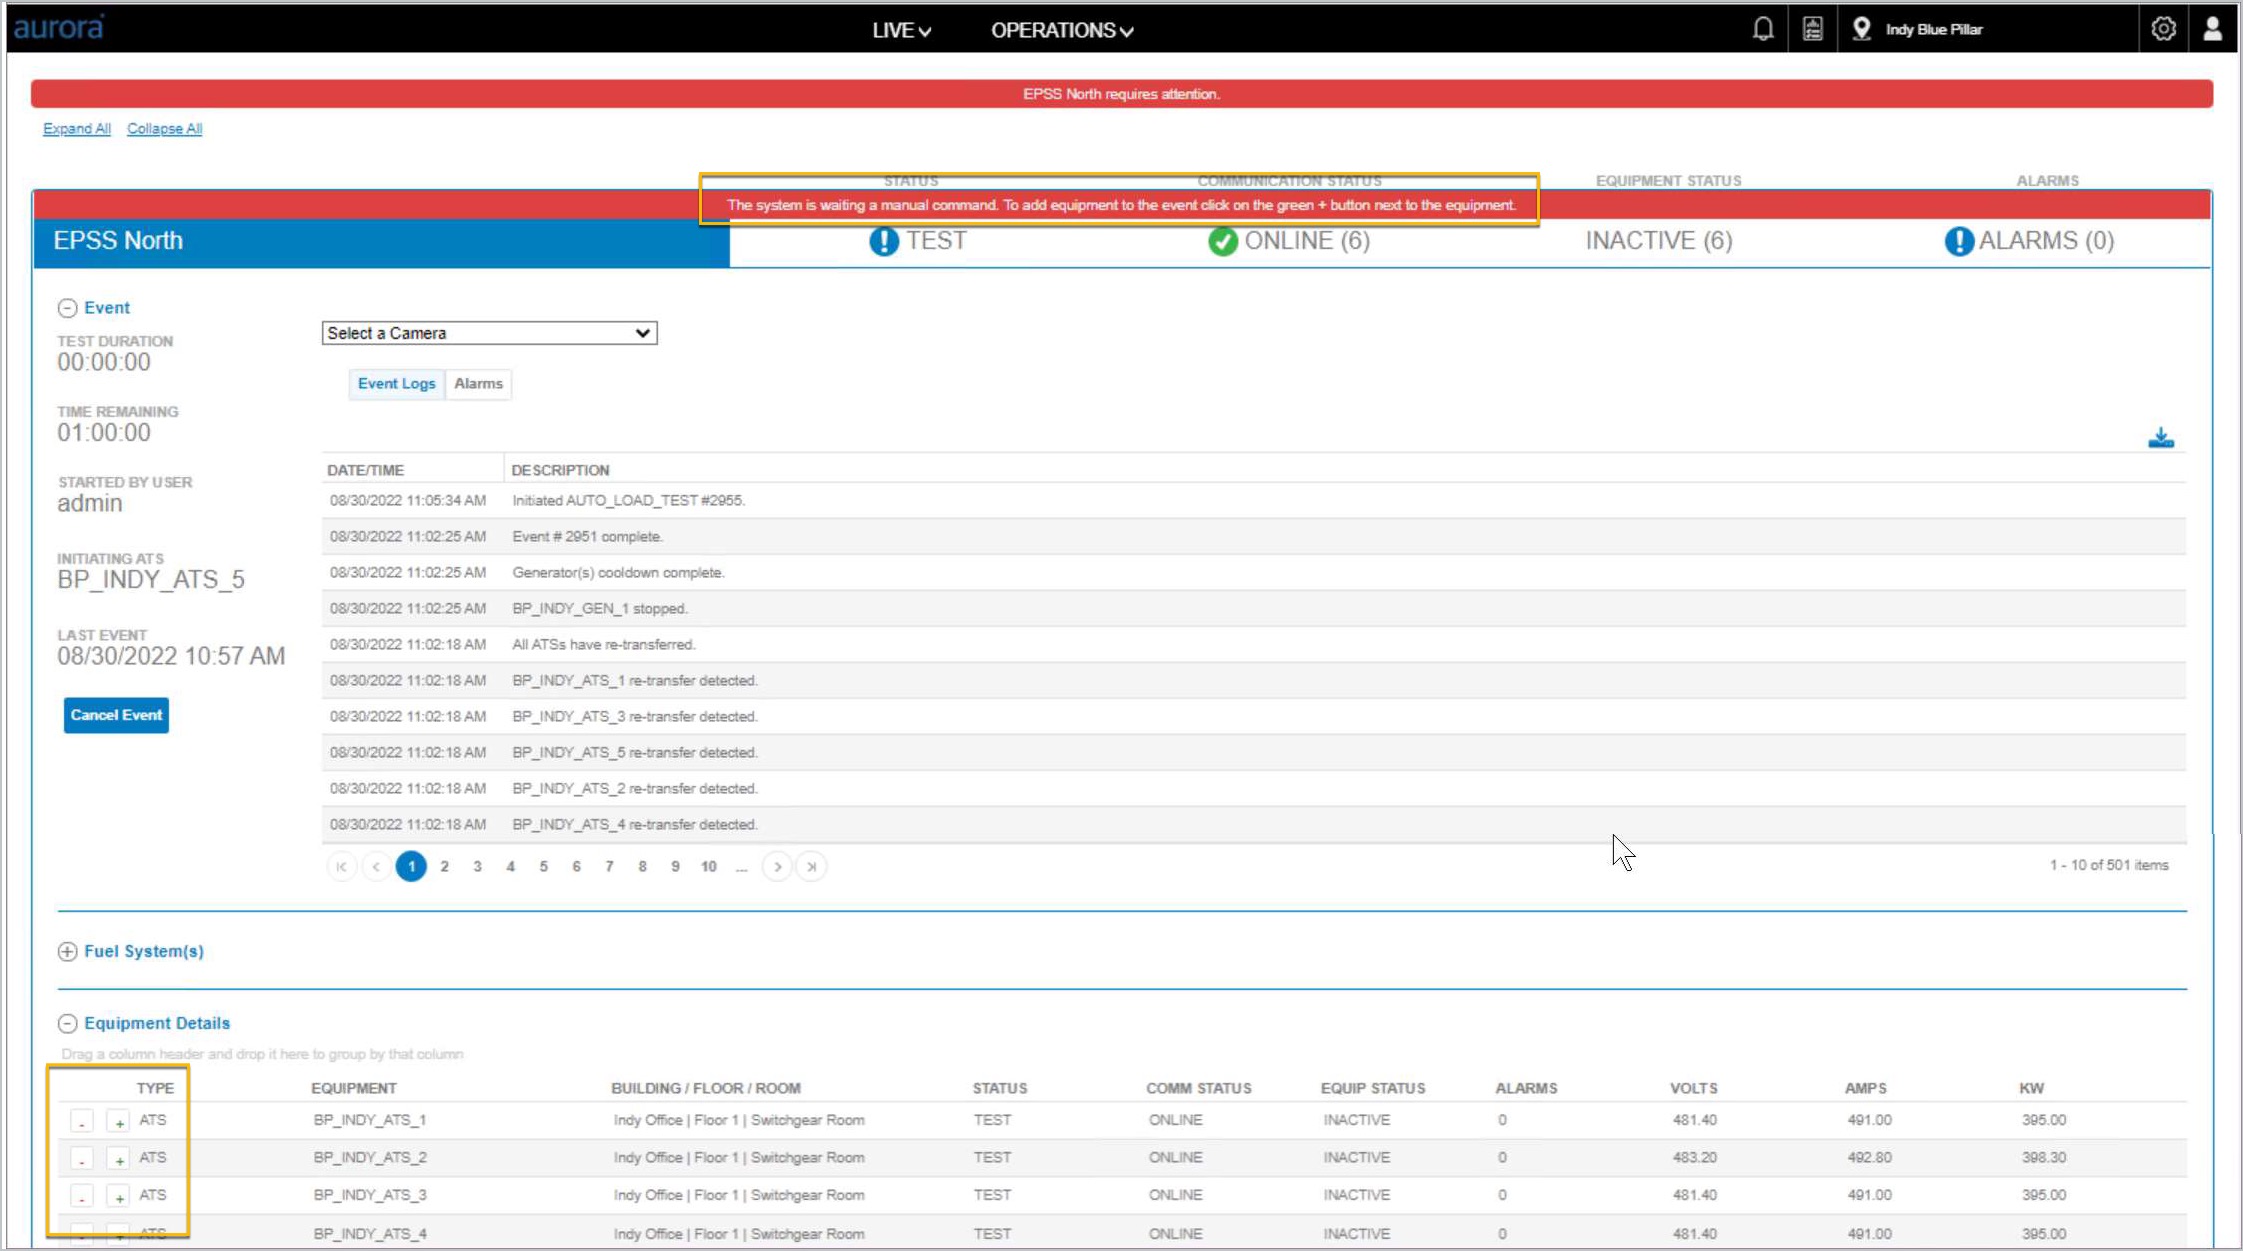
The platform sets the event status to Test and the equipment status displays the number of active equipment.
Once the initiating ATS has transferred to emergency power, select the [+] button for the next ATS to transfer; the platform sends the command to transfer the ATS.
Repeat the previous step until all ATS(s) [+] have been selected.
Optional: ATS(s) can be removed from the test by selecting the [-] button.
By this time the generator(s) should be running.
In Equipment Details, the platform displays the equipment in the test along with an Active equipment status.
Once all ATS(s) have transferred, the platform will pause and wait a configured period before starting the event timer.
When the event time remaining reaches 00:00:00, the platform will display the message, The system is waiting a manual command and displays a [-] button next to each ATS in the Equipment Details.
Select each ATS [-] button to send a command to re-transfer the ATS; the ATS(s) will re-transfer and the generator(s) will stop.
Once all the ATS(s) have returned to utility power and generator cooldown has completed, the platform will end the event.
An event can be cancelled at any time by clicking Cancel Event.
Refer to the Event History topic to learn how to access event details and reports.
Manual Configuration Test Type
While in the EPMS view, select the Start Event button in left navigation so that the platform displays the Event Setup Wizard.
Select the Test Type from the Event Type list.
After the Event Type is selected, the Next button will be activated. Click to proceed.
Select the Manual Config Test Type in the Event Setup Wizard.
Enter a Duration (minutes).
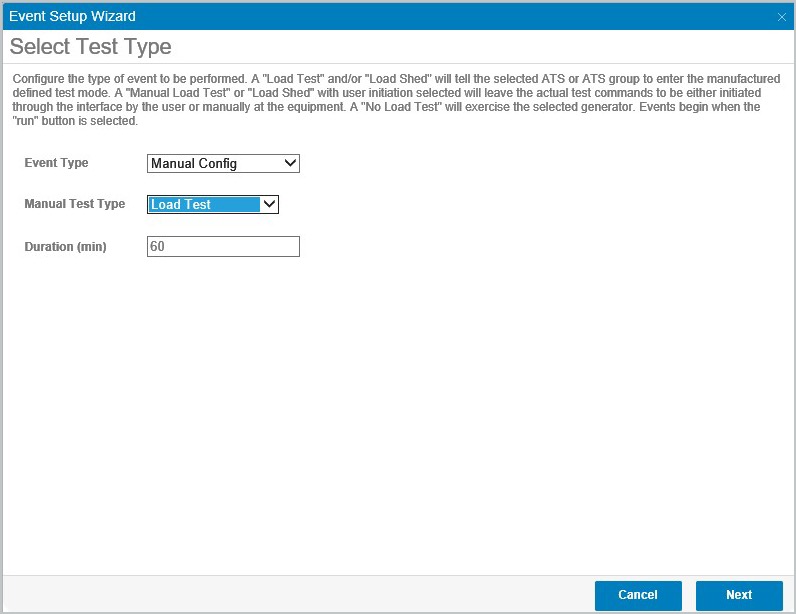
Click the Next button when ready to proceed.
Use the default Report Title or change the name of the event.
Use the default email or change/add an email separated by commas to receive event reports.
If applicable, use the toggles in the System Checklist fields.
Select an ATS Event Group.
Use the default (suggested) from the drop down menu Initiating ATS -or- select a different one if needed/configured.
Select Initiate commands through the User Interface only if each piece of equipment will be controlled manually from the platform User Interface.
When using this toggle, clarification of the event will appear on screen.
Skip to use defaults or modify the entries for Block Time (sec) and Block Size.
Skip to use defaults or modify the entries for Time to wait to begin event data capture (min).
Optional: Select the Enforce 30% load rule to start test for the system to start the test once the generator reaches 30% of the rated kW.
Click the Next button to continue with the Event Setup Wizard.
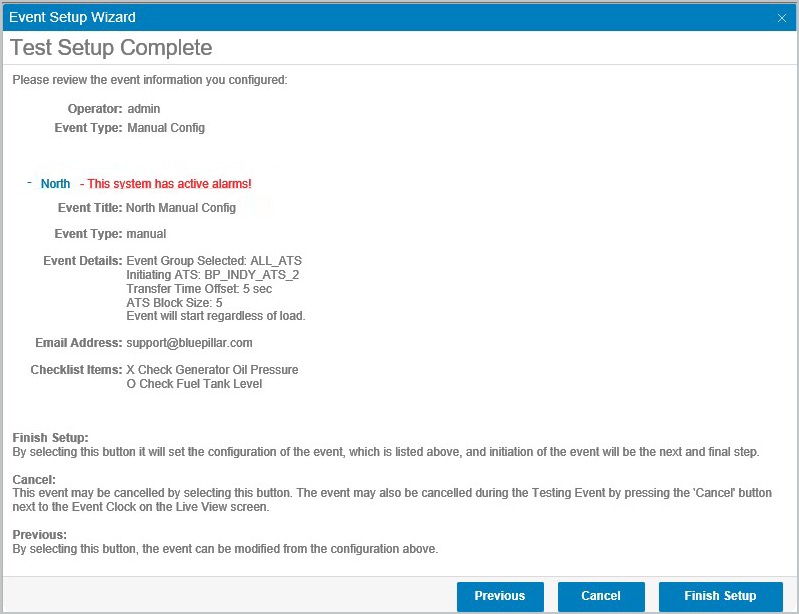
Expand the system details by clicking on the (+) symbol next to the system name so that the platform displays event setup details.

Review entries and selections.
Click the Previous button to make modifications to entries on the previous page.
Use the Cancel button to cancel the event setup. Any actions will be lost.
When ready to proceed, select the Finish Setup button. The platform will display a final confirmation screen.
Click the Run Test button to start the test.
The test will start once clicking the Run Test button.
Monitor the test from the EPMS screen.
The platform will initiate the test and send commands to the ATS(s) to transfer to emergency power.
The platform sets the Status field to TEST and the Equipment Status field will provide the number of generators and ATS devices with an active status in the section heading.
The ATS(s) will transfer and the generator(s) will start.
In the equipment details the platform displays the equipment in the test with an Active status.

Once all the ATS(s) have transferred, the platform will pause and wait a configured period before starting the event timer.
When the event time remaining reaches 00:00:00, the platform will send stop commands to the ATS(s) to re-transfer to normal power.
The ATS(s) will re-transfer and the generator(s) will stop.
Once all the ATS(s) have re-transferred and the generator(s) cooldown processes have completed, the platform will end the event.
The event can be cancelled at any time by clicking the Cancel Event button.
See Event History in this user guide to learn how to access the event details and reports.
Events on Multiple Systems
From the EPMS screen and while viewing a system, click to select the Start Event(s) button in the upper right portion of the screen; the platform launches the Event Setup Wizard.
Select the Test / Load Type in the Event Type field.
Click to select Next; the platform will launch the event configuration screen.
Use the default Report Title or change the name of the event.
Use the default email or change/add an email separated by commas to receive the event reports.
If applicable, check the System Checklist items.
Select an ATS Event Group.
Use the default Initiating ATS menu option (recommended) or select a different one.
Select Initiate commands through the User Interface only if each piece of equipment will be controlled manually from the platform User Interface.
Skip to use the default configured entries for Block Time (sec) and Block Size.
Skip to use the default configured Time to wait to begin event data capture (min).
Optional: toggle to select Enforce 30% load rule to start test for the system to start the test once the generator reaches 30% of the rated kW.
Click to select Next to continue the Event Setup Wizard to setup the next system for the same test.
Repeat steps (4)–(12) to setup the next system in the test.
Click to select Next to continue with the Event Setup Wizard to setup.
Expand system details by clicking the (+) symbol next to each system name; the platform displays event setup details.
Review the selections.
Click Previous to make changes to the event.
Click Cancel button to cancel event setup. Any actions will be lost.
When ready to proceed, click Finish Setup; the platform will display a Test Setup confirmation screen containing multiple entries in the wizard.
Click to select the Run Test button; the platform will start the test.
Monitor the test from the EPMS screen.
To view each system’s test activity, click the Collapse All link; then click the system header to expand only that system for full viewing. The platform will conduct the system tests simultaneously.
The platform will initiate the test and send commands to the ATS(s) to transfer to emergency power.
The platform sets the event status to Test; the Equipment Status displays the number of active devices.
The ATS(s) will transfer and the generator(s) will start.
In Equipment Details, the platform highlights equipment in the test along with a status of Active.
Once all the ATS(s) have transferred, the platform will pause and wait a configured period before starting the event timer.
When the event time remaining reaches 00:00:00, the platform will send stop commands to the ATS(s) to re-transfer to normal power.
The ATS(s) will re-transfer and the generator(s) will stop.
Once all the ATS(s) have re-transferred and the generator(s) cooldown periods have completed, the platform will end the event.
The event can be cancelled at any time by clicking the Cancel Event button.
See the Event History topic to learn how to access event details and reports.