Alarm Indicators
The platform is pre-configured with Generator Alarms, Generator Running Alarms, and Communication Alarms. These alarms are displayed in the Alarm queue and can be sent via email or text. In the application header a bell icon that provides an indication if your location has an alarm or not. Red denotes active alarms. Yellow indicates unacknowledged alarms.
To display Alarms, navigate to the app header; at upper screen right, click the alarm bell icon; the platform displays the alarm queue.

View Alarms: Access Icon Upper Right
Click in the checkbox next to the alarm to acknowledge it.
Click the Acknowledge button.
The Inactive Alarms that are acknowledged will be removed from the Alarms list.
The Active Alarms that are acknowledged will still appear in the Alarms list without a checkbox, unless the criteria itself has cleared.
Yellow Alarm Indicator | Removed from screen after acknowledged |
Red Alarm Indicator | Only removed from screen after alarm conditions cleared |
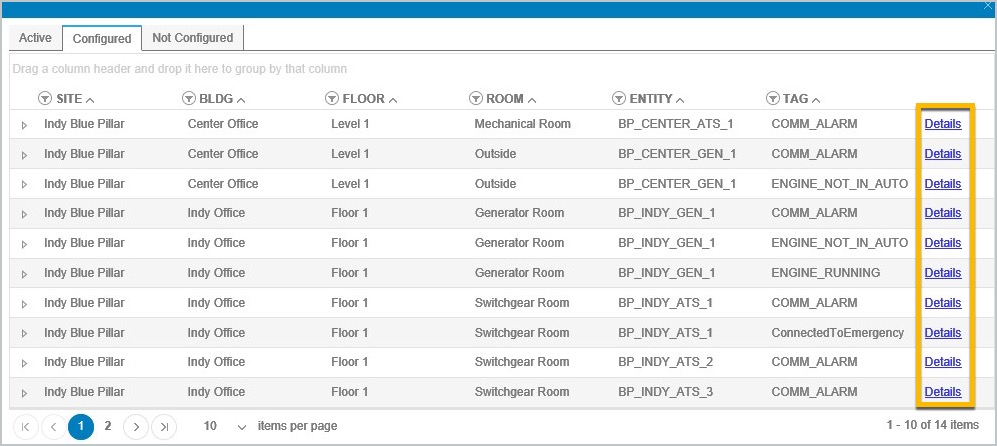
View Configured Alarms
To display the Alarms, navigate to the app header and select the alarm icon; the platform displays the alarm queue.
Select the Configured tab; the application displays a list of configured alarms.
Select one of the Details links to view alarm details. For updating these settings, continue to the next section.
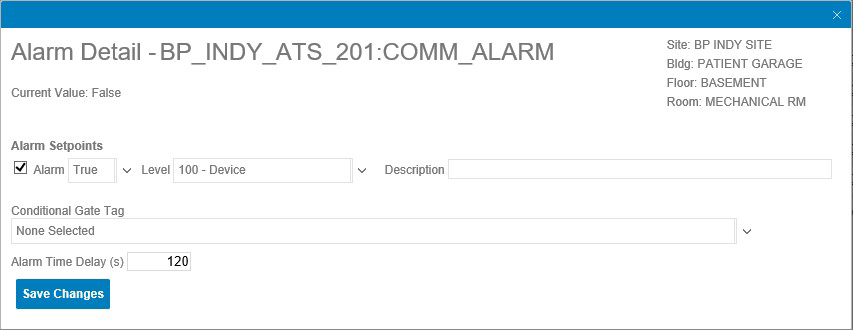
View Alarm Details
Update Configured Discrete Alarms
One or more of the following can be done to modify a discrete alarm.
Select the checkbox to remove the check to no longer alarm on this set point.
Select the discrete value field to change the true/false condition the alarm should be triggered on.
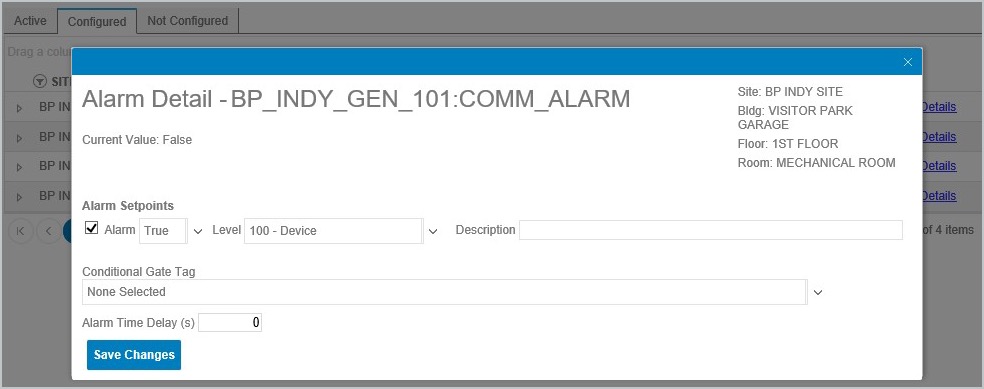
Adjust Alarm Setpoints and Related Fields
Select a different level in the list of available values by clicking the arrow key to the side of the field.
Enter or change the alarm description to be used in the alarm modal and alarm email notification.
Select or Remove the Conditional Gate Tag.
If necessary, update the Alarm Time Delay(s).
Be sure to click the Save button.
Updating Analog Alarms
One or more of the following can be done to modify an analog alarm.
Select the alarm Setpoint check box to include it as an alarm.
Deselect the alarm Setpoint to remove it as an alarm.
Next to the Alarm Set Point, change the value at which the alarm should be triggered.
Select a different value in the list available (see Level on screen).
Enter or change the alarm description that will be used in the alarm modal and alarm email notification.
Select or remove the Conditional Gate Tag.
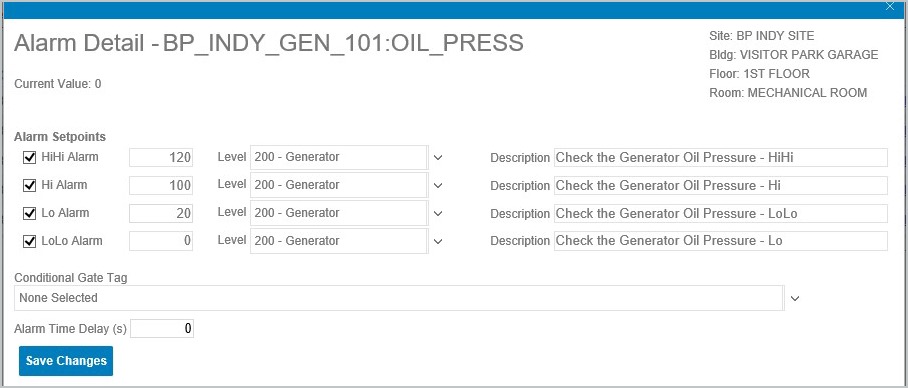
Analog Data Points
If necessary, Update the Alarm Time Delay(s) field.
Be sure to click Save Changes to maintain these settings.
If the End User attempts to remove an alarm that is associated to another alarm in the Conditional Gate Tag, the application will display a message that the other alarm configuration will need to be modified.
View Non-Configured Alarms
To display Alarms, navigate to the app header select the alarm icon. The platform will display the alarm queue.
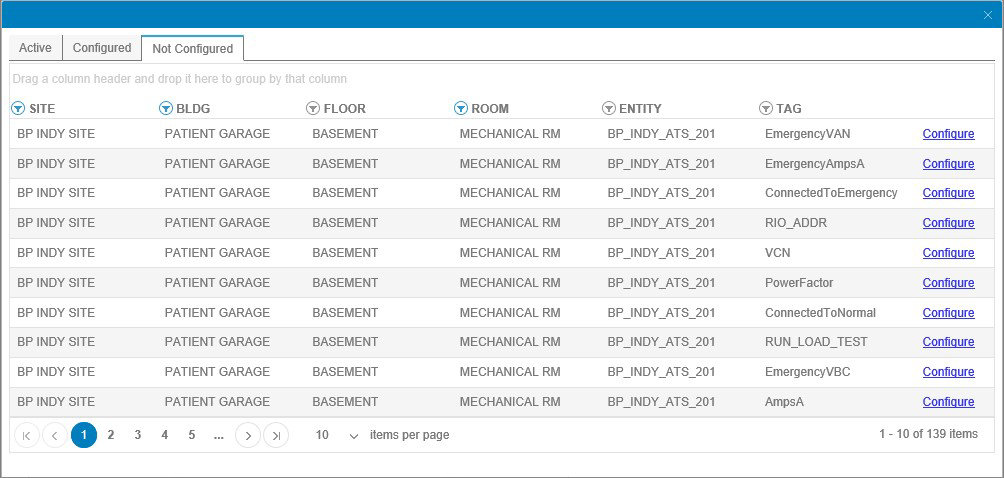
Non-Configured Alarms List
Click to select the Not Configured tab. The application will display a list of alarms that are not yet configured.
Configuring Discrete Alarms
To display the Alarms, navigate to the app header select the alarm icon. The platform displays the alarm queue.
Click to select the Not Configured tab. The application displays a list of alarms not yet configured.
Select the appropriate Configure links for a discrete alarm. The application displays an alarm configuration modal.
Alarm Configuration Modal
Toggle to select the checkbox to add an Alarm Setpoint.
Select True or False for the alarm condition.
Select an Alarm Level.
Enter an optional alarm description to be used in the alarm modal and in alarm email notifications.
Select a an optional Conditional Gate Tag.
Provide an Alarm Time Delay (s).
Click Save.
When creating Analog Alarms, alarm data setpoints are given in the form of value inputs.